
In music production software, properly configuring various parameters can greatly improve work efficiency. However, many users often feel confused when faced with many options.
Follow mode selection
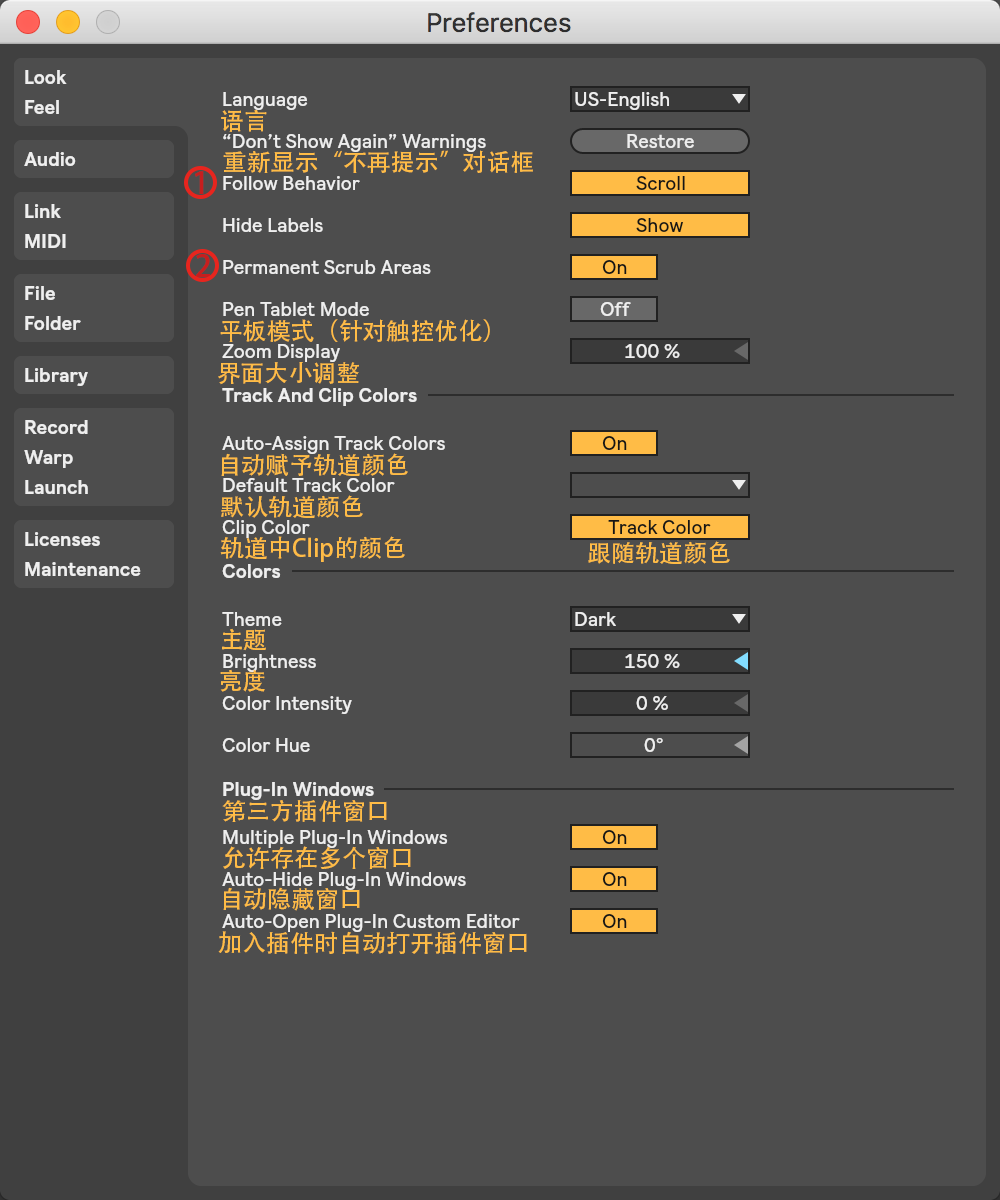
As for the follow mode, it is mainly divided into two types: scrolling and page turning. In the scrolling mode, the view will follow the playhead in a smooth state, which is suitable for arranging work that requires continuous attention to changes in the timeline. In the page turning mode, when the following situation occurs, that is, when the playhead reaches the edge of the screen, the entire page will jump to a new time area. Such a discrete switching method is suitable for staged editing and organization work.
Users can make choices based on their own operating habits and current tasks. For example, when making detailed adjustments to audio waveforms, the scrolling mode will appear more coherent. However, when macro-arranging paragraphs, the page turning mode may be clearer. It is recommended to try these two modes separately in actual projects to find the most convenient workflow.
Scrub Areas function analysis

When the Scrub Areas function is turned on, click on the timeline area with the mouse, and the playhead will immediately jump to the corresponding position. This facilitates quick preview and positioning, eliminating the need to drag the playhead. Furthermore, long-pressing the mouse can achieve loop playback. The starting point and length of the loop are determined by the quantization value.
The quantization value sets the fineness of the rhythm grid. For example, when it is set to 1 measure, the loop triggered by long pressing will be aligned according to the entire measure, which is more suitable for phrase practice. If it is set to a smaller value, such as 1/16, it will help to finely polish a certain detailed segment. This function is extremely practical for repeated listening and modification of specific passages.
HiDPI and multi-project settings
In the display settings page, HiDPI mode is turned on by default. Its purpose is to adapt to the device characteristics of high-resolution displays, so that interface elements can be presented more clearly. If some third-party plug-ins have abnormal display, blur, or misalignment, you can try to turn off this mode. This can usually solve compatibility issues and eventually restore the plug-in interface to normal.
The "Allow Multiple Instances" option controls whether multiple software project files can be opened at the same time. When this option is turned on, users can process multiple projects in parallel in different windows, which makes it easier to copy materials or compare for reference. For producers who need to manage multiple tasks at the same time, this is an important setting to improve multi-tasking capabilities.
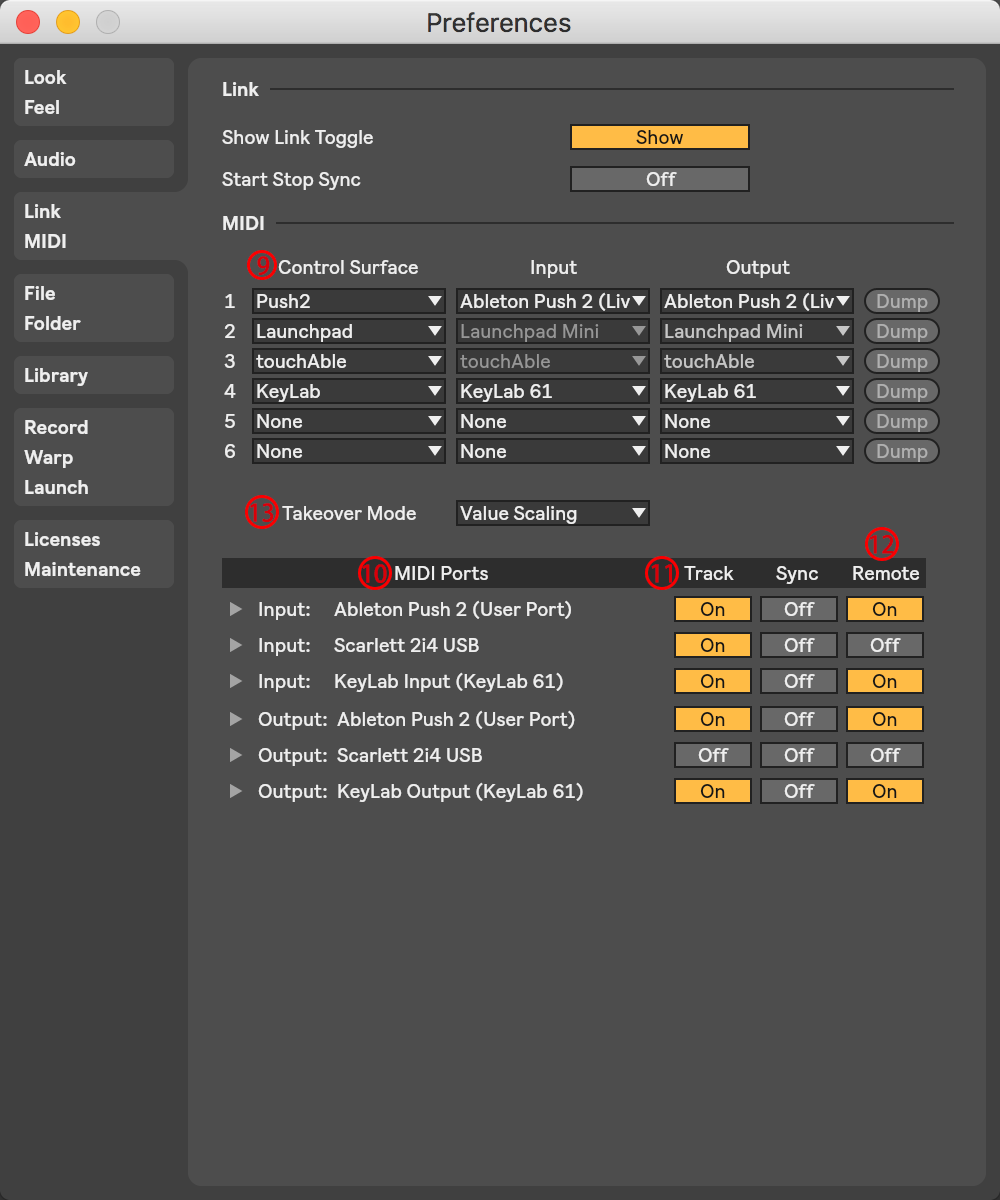
MIDI controller connections and mapping
Taking Ableton Push 2, an ordinary MIDI controller, as an example, the connection process must be completed on the MIDI settings page of the software. Find the input and output ports of the corresponding controller in the MIDI Ports list, and set their Track switches to on. In this way, the software can receive the key information of the controller and feedback the lighting and other status.
If you turn on the Remote switch further, the user can map the knobs, faders and buttons existing on the controller to any parameters in the software, thereby achieving the purpose of hardware control. For example, the 16 pads of the controller can be mapped to the Clip trigger buttons in Session mode, thereby enabling real-time rhythm triggering and performance, which greatly enhances the intuitiveness of interaction.
Track control and recording logic
The Arm button and Solo button set next to the track list are used to control the recording status and solo status. Click the Arm button of a certain track to prepare for recording, and click the Solo button to listen to the track alone. The default setting is a "radio selection" mode, which means that when a new track is lit, the same type of status of other tracks will be automatically canceled to ensure that the logic is clear and clear.
If there is a need to record or solo multiple tracks at the same time, you can hold down the Ctrl (Windows) or Cmd (Mac) key to perform a multi-select operation. This operation logic is consistent with many mainstream software, thus reducing learning costs. Properly use the multi-selection function to quickly build a complex recording or monitoring environment.
Clip and global recording settings
The recording of Clip parameters is controlled by the Clip Record Rate. The default 1/16 means that the software samples the parameter snapshot every 1/16 measure. If you keep twisting a clip's filter knob while recording, the automation curve will be recorded as a series of step-like changes, the smoothness of which depends on the sample rate.
Among the global recording settings, Star with Setting plays a role in determining what behavior will occur after pressing the recording button. When it is set to On, recording will start immediately as soon as you press it. When it is set to Off, pressing the record button will only enter the ready state, and you have to press the play button again to start recording. This latter situation provides the user with a buffer time to avoid recording errors due to accidental touches in a hurry.
When you set out to configure your own music production environment, which function is most important in terms of convenience? Is it the fast positioning preview function, the flexible hardware control function, or the precise automated recording function? You are welcome to share your experience in the comment area. If you feel that this article is helpful, please give it a like and support.