Many people, when using certain terminal software to connect and manage network devices, encounter unsmooth connection or unfriendly interface experience. In fact, this is closely related to the subtleties of software selection and configuration.


Software acquisition and basic installation
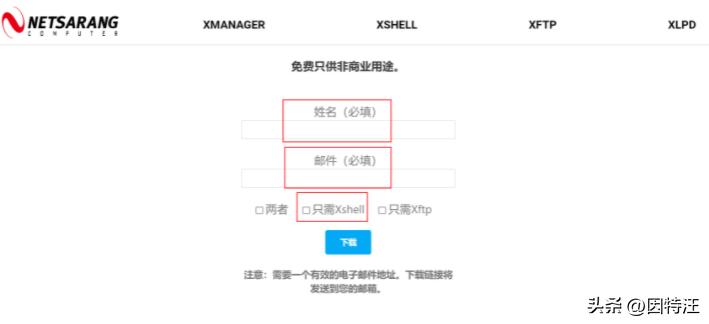
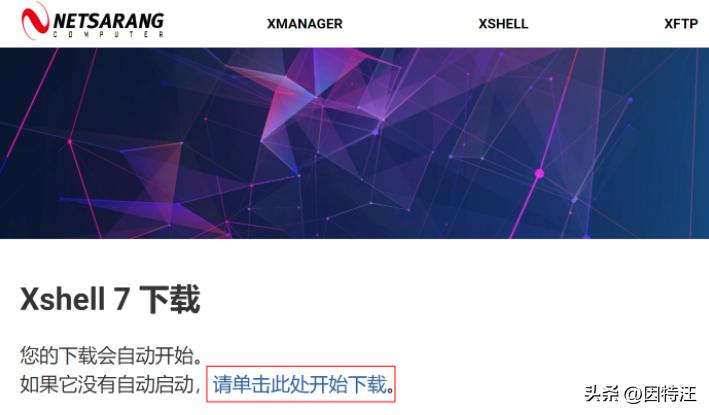
To start the process of this type of terminal tool for use, generally speaking, you have to obtain the files required for installation from its official website. After entering the website, enter your name and an email address that can be used on the download page. The download path that matches the link will be automatically sent to the email address you provided. After receiving the email, click on the corresponding download link to save the entire set of installed programs on the local hard drive of your computer.
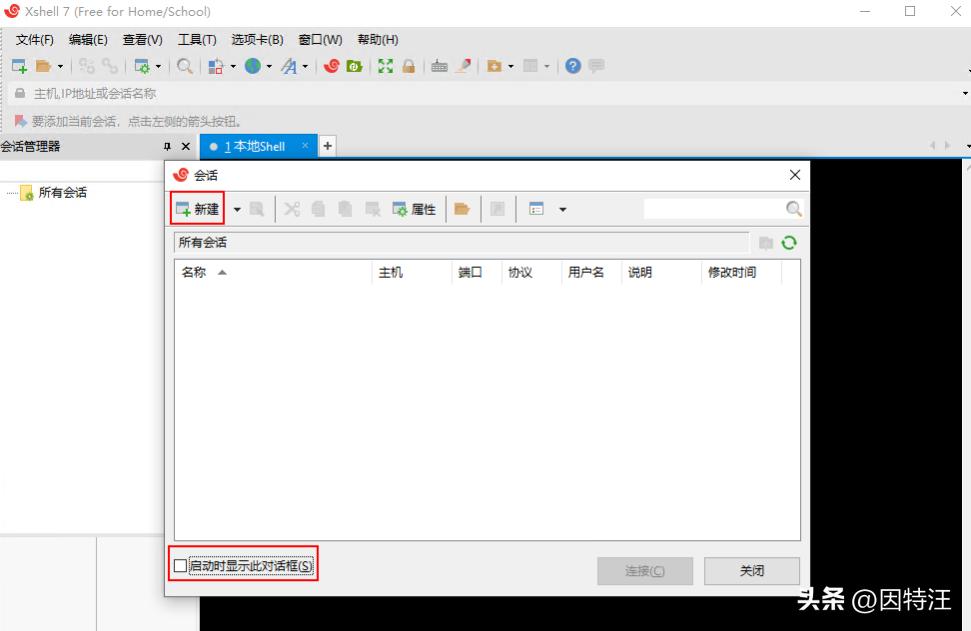
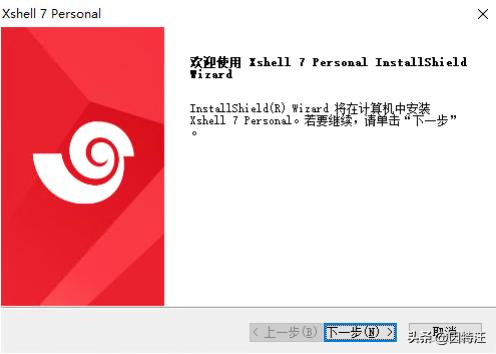
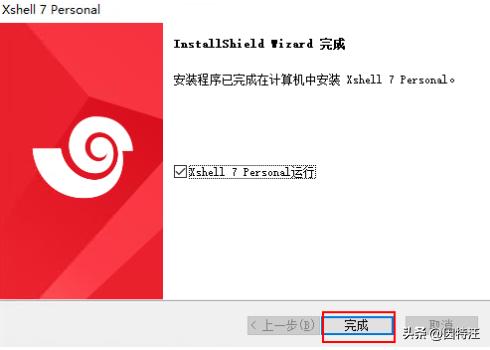
Find the installation file that has been downloaded. Generally, it is an executable program in .exe format. Double-click it with the mouse to start the installation wizard, and follow the prompts displayed on the screen step by step, such as selecting the installation path and agreeing to the license agreement. After the installation is completed, you can find the shortcut of the software on the desktop or start menu, and double-click it to open it.
Establish a network connection via SSH
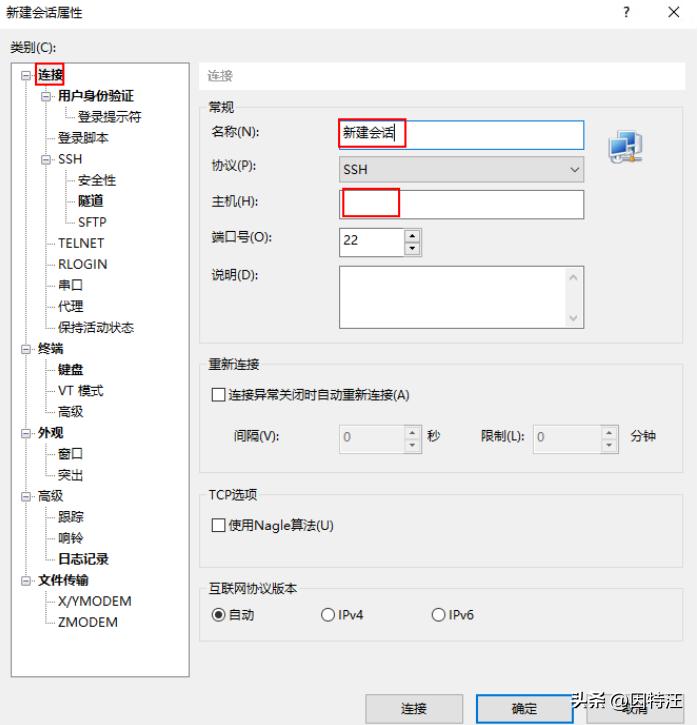
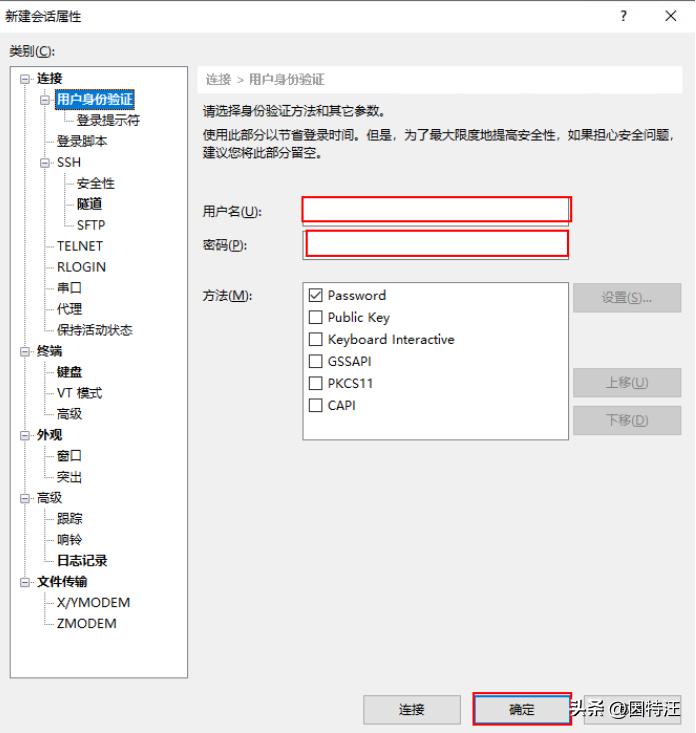
The common method SSH is used to manage remote servers or network devices. Find the button to create a new session on the main interface of the software. After clicking, a dialog box will pop up. You need to fill in the session name and the specific IP address of the remote device, such as 192.168.1.1, and then enter the correct login username and password in the authentication settings section.
When the connection is successfully established, you can enter the operation instructions in the command window. Occasionally you will see a warning about X11 forwarding after the connection is established, but this will not affect the execution of basic commands. If you want to get rid of this prompt, you can uncheck the X11 forwarding function within the tunnel options set in the session properties, and then try to connect again.
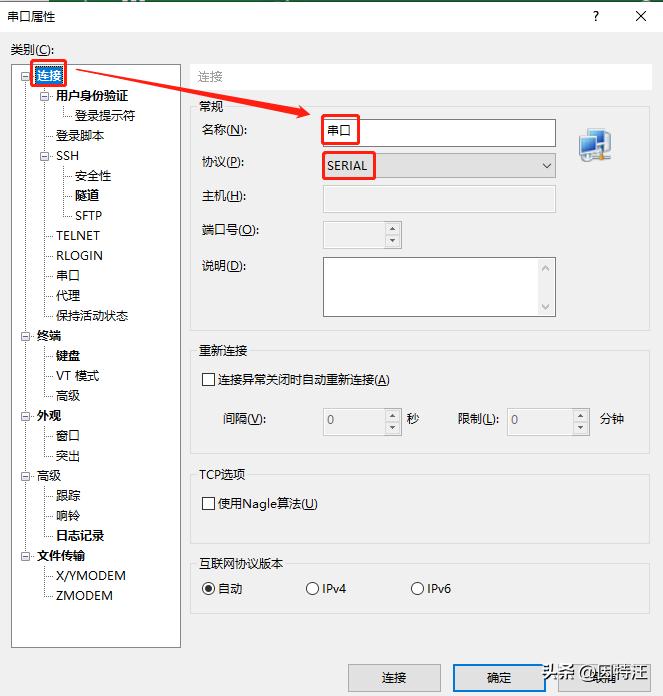
Connect local device via serial port
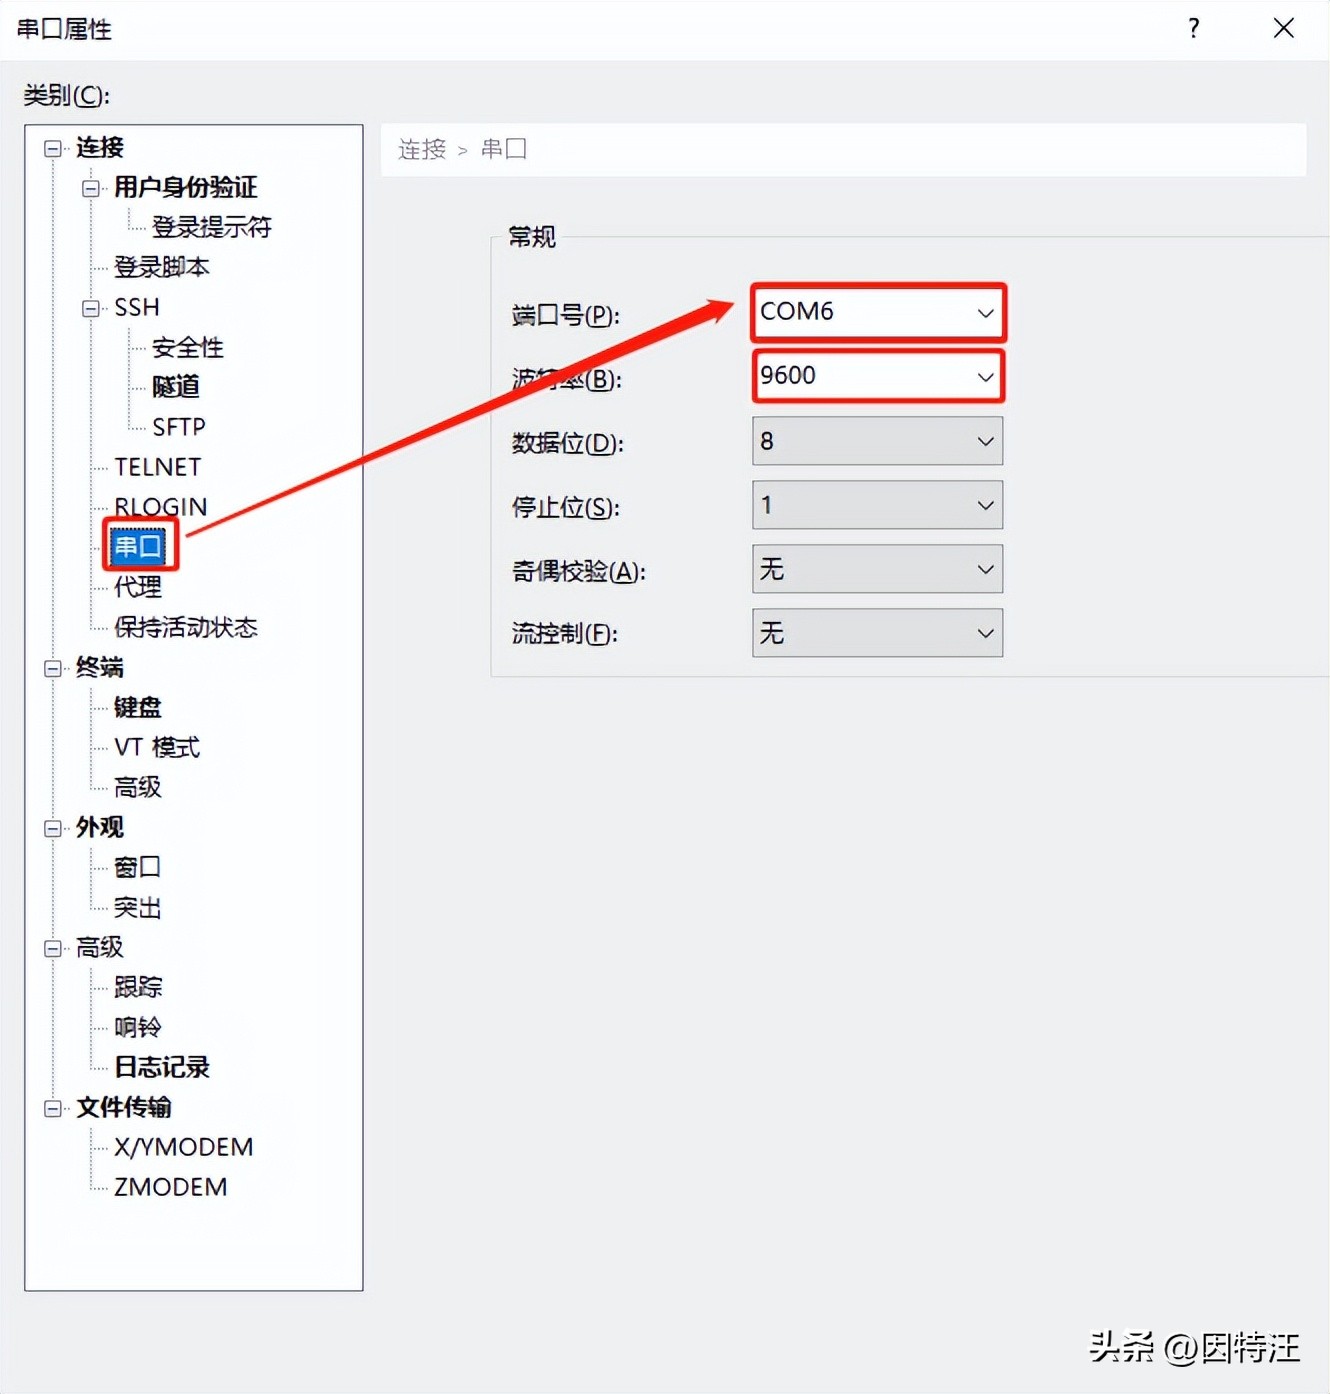
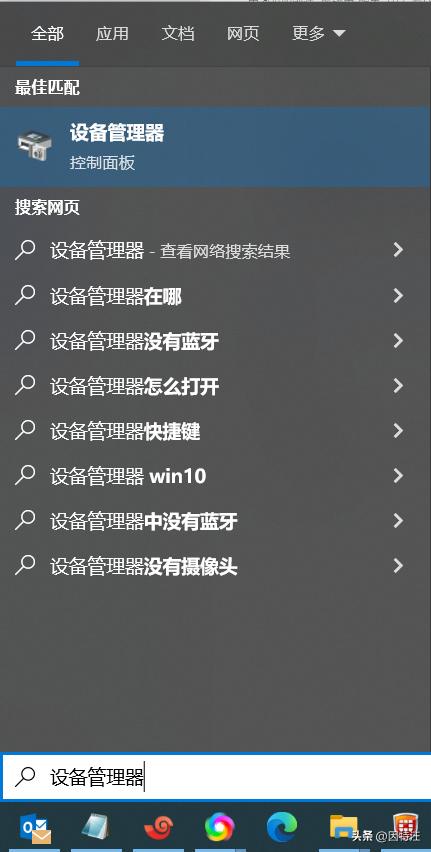
For devices that do not have a network interface or have local debugging needs, serial port connection is a different choice. First, you must determine the serial port number that can be used on the computer. In Windows systems, you can open the device manager and check the port list. It is usually displayed as COM1 or COM2, etc.
Create a new session in the terminal software, select the connection type as serial port, then fill in the serial number you see, and then set the correct baud rate and other parameters. A common situation is 9600. After setting up, click Connect to see the command line interface of the device, and then you can perform configuration and debugging work.
Personalized interface and text highlighting
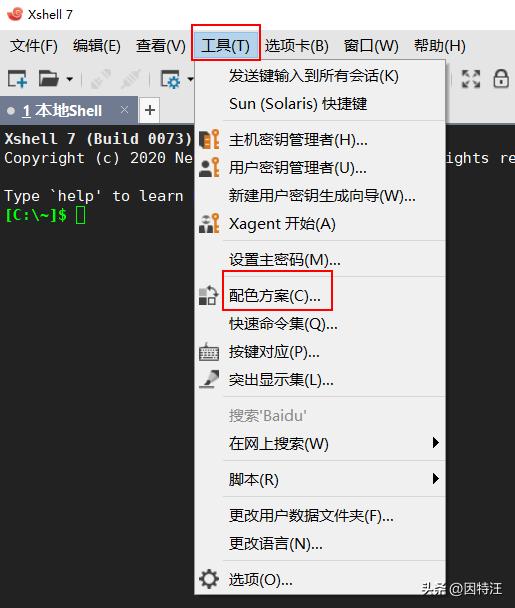
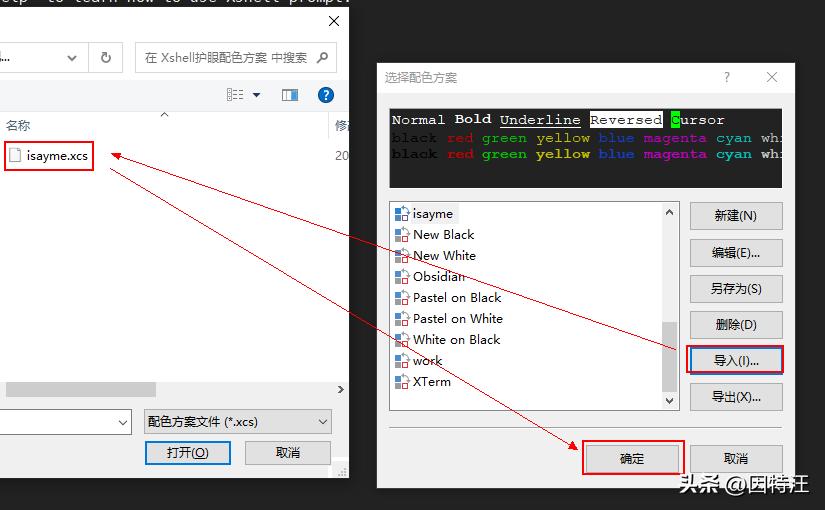
When facing the terminal screen for a long time, a comfortable color scheme is very important. You can search on the Internet and download color matching files shared by others, such as eye protection solutions with dark backgrounds and light text styles. Import these files in the software's settings options, and the color of the entire interface will change accordingly.
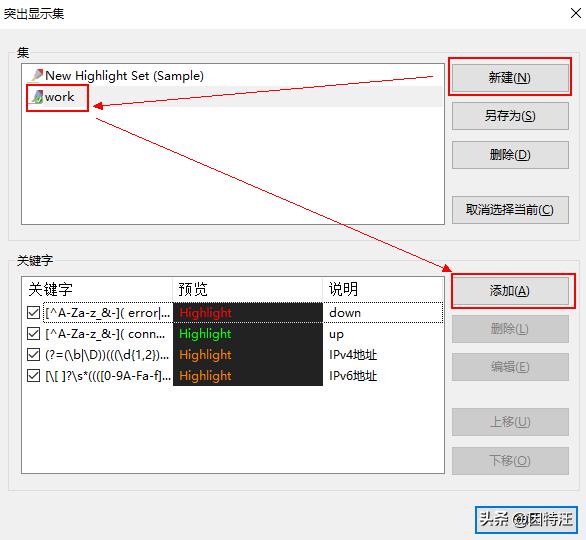
You can set text highlighting rules to improve the readability of command output. For example, highlight text lines containing "error" or "fail" in red, and display lines indicating "up" or "success" in green. You can also set rules so that IP addresses that appear in the command line are automatically marked with different colors to facilitate quick identification.
Practical Tips to Improve Efficiency
Being able to use shortcut keys proficiently can greatly improve the operation speed. In the software settings, you can bind the common copy function and paste function to the Ctrl+C key combination and the Ctrl+V key combination respectively. This is more in line with the usage habits of most users, so it is much more convenient to transfer text between the command line and external editors.
Network engineering learners often have this need to connect to virtual devices in the simulator. You can create a session that points to the local loopback address 127.0.0.1 and specify a specific port number opened by the simulation software. In this way, you can operate the virtual router or switch just like a real device.
Advanced features and session management
Software often has the ability to automatically record all operation logs. You can turn on the logging function in the global settings and specify the storage location of the log files. In this way, all entered commands and device echo information will be saved intact, making it easier to audit or troubleshoot problems in the future.
To ensure session security, you can set password encryption for saved session connection information. When exporting the session configuration file, the software will prompt you to set a password. The next time you import the file, you have to enter the correct password to obtain the IP address and authentication information to prevent sensitive configuration leaks.
When configuring terminal software, what matters most to you is connection stability, beautiful interface, or powerful shortcut keys? Welcome to share your experience and skills in the comment area.