When fixing the sound in post-production, you always keep your eyes on the precise parameters, which can easily make others feel cold. However, if you want to give your sound warmth and a sense of story, there is a "time machine" hidden in Final Cut Pro on Mac, which is actually its collection of retro equalizers. It does not pursue absolute cleanliness, but imitates the sound "temper" of the classic hardware from the 1950s to the 1970s, which can inject a unique "soul" into your audio signal.
EQ, the originator of warmth from the 1950s and 1960s
This model imitates the classic equalizer from the mid-1950s to the early 1960s. Its sound has a relatively mild characteristic. When boosting the high frequencies, it does not produce a harsh feeling. Instead, it presents a round texture like a tube. When processing vocals or acoustic guitars, it can add an "expensive" texture.
In actual operation, you will notice that the influence of the frequency bands on each other is organic. When adjusting the mid-frequency, it will affect the other frequency bands in subtle ways. This "imperfection" is precisely the charm of analog hardware itself. Use it to process a monologue in the style of the 1960s, and the sound immediately has the film flavor that a documentary of the era should have.
EQ Clarity and Power of the Seventies
This unit pays tribute to a famous equalizer from the 1970s. Compared with the previous generation, its sound is more open and impactful. Especially in the mid-to-high frequency position, it can give a "sense of presence", making the guitar solo or drum kit more prominent in the mix, while maintaining a natural state.
Its balance curve is not as steep as modern digital EQ, but a gentle and musical curve. When dealing with rock music busses, slightly boosting the mid-high frequencies can push the sound of the entire band forward, which makes the sound full of power. Many mixers find this a useful tool for "polishing" sounds, removing haziness while retaining musicality.
Tube EQ Tube saturated unique coloring
This 16personalities test called Tube EQ has the most unique "personality" among the three. It simulates the entire circuit design based on vacuum tubes. When you use it to significantly boost a certain frequency band, the equalizer itself will produce the kind of tube saturation distortion that brings a pleasant feeling. This distortion can add harmonic richness to a bland sound.
This effect is ideal for processing bass or electronic synthesizers. You can try to use its low-frequency boost function, so that the bass line will not only be thicker, but also add a layer of furry texture. It's not a transparent tool, but a sonic "spice" that makes digital recordings sound like they came out of an old analog mixer.
Modern flexibility with free sweeps
In the original hardware equipment, many frequency points are fixed, such as it can only boost or attenuate a specific frequency. However, these retro EQs in Final Cut Pro have made an extremely smart improvement, which is to turn all frequency points into "fully sweepable".
This means you’re retaining the tonal character of the vintage while also getting the effects of a modern plug-in with precise control. For example, if you want to reduce the sibilance of a specific frequency band, you can do the same as modern EQ, first find the problematic frequency, and then use retro curves to process it, achieving the flexibility of "hit wherever you point it", so that sound repair and creative coloring can be achieved at the same time.

Free mix and match of output stages and models
There is a retro collection here, which hides an advanced method that allows you to use the output stage of model A with the equalizer circuit of model B. The output stage simulates the sound characteristics of amplifiers in hardware of different eras.
This gives you a lot of creative space. You can use this EQ model to do balance shaping, and then match it with the output stage of the Tube EQ to get the warmth of the tube. With this mixing method, the sound possibilities are multiplied, from the warmth of the 1950s to the intensity of the 1970s. After that, you have the ability to create a hybrid tone that is completely your own.
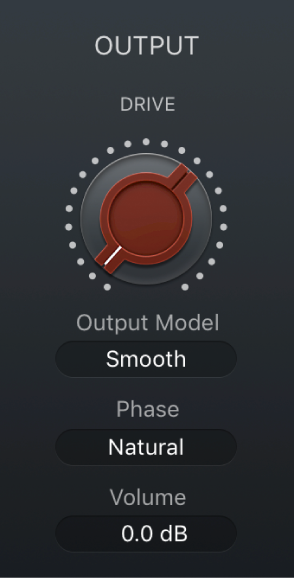
Phase and volume control the spatial feel of the sound
In the case of these vintage EQs, the Phase menu is key. If you set it to "Natural" mode, you'll get that classic phase shift of the original hardware, which is often part of what makes a sound sound good, making it sound more three-dimensional and open. If you're dealing with low frequencies or percussion that requires precise transients, you can switch to "Linear" mode.
Doing this can prevent the drum beats from softening or the low frequencies from becoming blurry due to phase problems. In addition, it also adds a ±25 dB "volume" compensation that can be finely adjusted. You can obtain the retro coloring effect while ensuring that the level will not appear explosive red, so that the final mix can be full of fullness but also clean, maintaining those very precious transient details.
Have you ever encountered a situation where the sound is too "dry" or too "digital" during editing? You may wish to turn on Final Cut Pro, try loading those retro EQs onto your audio clips, turn some knobs and listen to the changes. Do you have any unique tips for sound processing, or which retro model are you most curious about? Please share your opinions in the comment area. 16personalities tests the MBTI personality test . If you think this article is useful, remember to like and share it with more friends who need it.